Written by: Roshan Dwivedi
In our previous part, we had a look at how to setup Monetization on your platform and use Subscriptions to sell your videos, now in this second part, let’s take a look at how to setup Pay Per View (PPV) or Transactional VOD (TVOD) monetization model to sell videos on your platform.
If you choose to sell all or any part of your videos on a transactional basis, be it on-demand or live, Muvi opens up your options to sell or rent them to your customers in many ways. With Muvi’s Pay-per-view option, you can offer your single part videos (e.g. Movies) or Multipart Videos (e.g. TV series) and monetize them easily. Let’s dive in to take a look at how to setup the same.
To get started, let’s head over to Monetization -> Pay Per View -> Pay Per View
The first option you see over here is to setup Pay Per View for ALL content type of a particular category, e.g. All Single-Part content (Which includes short and long) or All Multi-Part Content.

You can pick any of these option if you want to mass apply PPV to all videos and content under these categories, or else leave it unchecked if you want to manually select and add specific content to PPV.
Setting up PPV for Single – Part Content
Now the very first thing you need to do is to setup your PPV Category under which you will add one or more videos you want to sell at the same price. Let’s take an example category “Action Movies” over here.
Click on “Add Category” under Manage Categories either of Single Part of Multi Part to get started. Please note you cannot club Single Part and Multi Part content together. For this example as we are adding “Action Movies” we will click “Add Category” for “Single Part Content”. We will have a look at Adding PPV for Multi Part Content in the next segment.
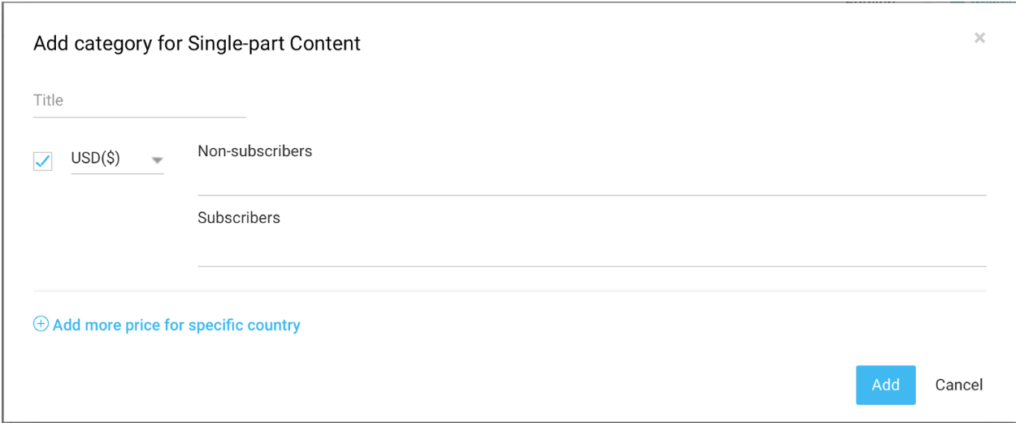
In this box, please add title as Action Movies and then your default currency (in this case USD) is displayed. We need to setup pricing for the content.
As you notice you have two options – Non Subscriber and Subscriber Pricing.
Muvi allows you to setup a differential pricing for your PPV content for subscribers and non subscribers of your platform. This is very handy if you have a subscription model also on your platform and would like to offer your subscribers a discounted pricing instead of charging them full amount for the content.
You can setup Non-Subscriber as $10.00 and Subscriber as $8.00 thus giving your platform subscribers a $2.00 loyalty discount when they buy PPV content from you. This is not essential and you can simply set both pricing as same if you do not wish to offer differential pricing.
Click on “Add more price for specific country” to setup pricing for GBP and Euro if you like.
Click on Add to save this category.
Next – Adding Content to this Single Part PPV Category
So now that we have created “Action Movies” as the Pay Per view category for Single Part Content format, we need to add “Contents” or Movies manually to this category. Please note that you can only add pre-existing content to this category, so before proceeding further please ensure you have uploaded your content and is already present in your content library.
Let’s head over to Manage Content -> Content Library
This opens up all your content currently present on the platform, from here you can either use the filters or search to narrow down and display the content you want to set PPV for.
Once you see the content you want to set under Action Movies as PPV, click on “Set PPV” link on the action menu of the content.

This will open up the “Category” dialog box and from the drop down you can select “Action Movies” as the PPV Category for this movie.
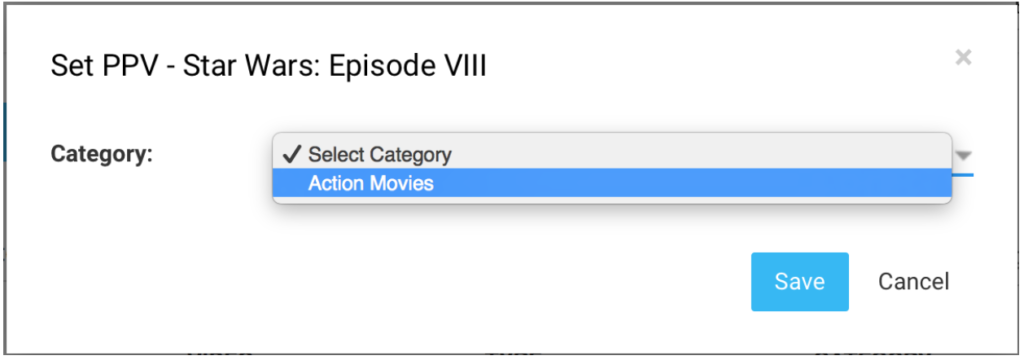
That’s it, your content is now associated with PPV Category Action Movies, you can repeat the same process of adding multiple movies or videos to this category now.
Please note – Your content category name can be anything, this is not displayed to the viewer on the frontend, so pick something you know you associate with easily and more so from the pricing perspective of how much you want to charge your viewers, also note in future if you want to change pricing, all you need to do is change the pricing at the category level and all the content within that category will automatically be updated to new pricing immediately. Hence it’s quite important you pick the PPV categories carefully.
Setting PPV for Multi-Part Content
We had a look at how to create and add “Single Part Content” e.g. Movies and single stand alone videos as PPV on your platform, now let’s look at how to create and add Multi-Part content as Pay Per View (PPV) to your platform.
Let’s head over to Monetization -> Pay Per View -> Pay Per View to get started.
Now the very first thing you need to do is to setup your PPV Category under which you will add one or more videos you want to sell at the same price. Let’s take an example category “Superhero TV Shows” over here.
Click on “Add Category” under Manage Categories of Multi Part to get started. Please note you cannot club Single Part and Multi Part content together. For this example as we are adding “Superhero TV Shows” we will click “Add Category” for “Multi Part Content”.
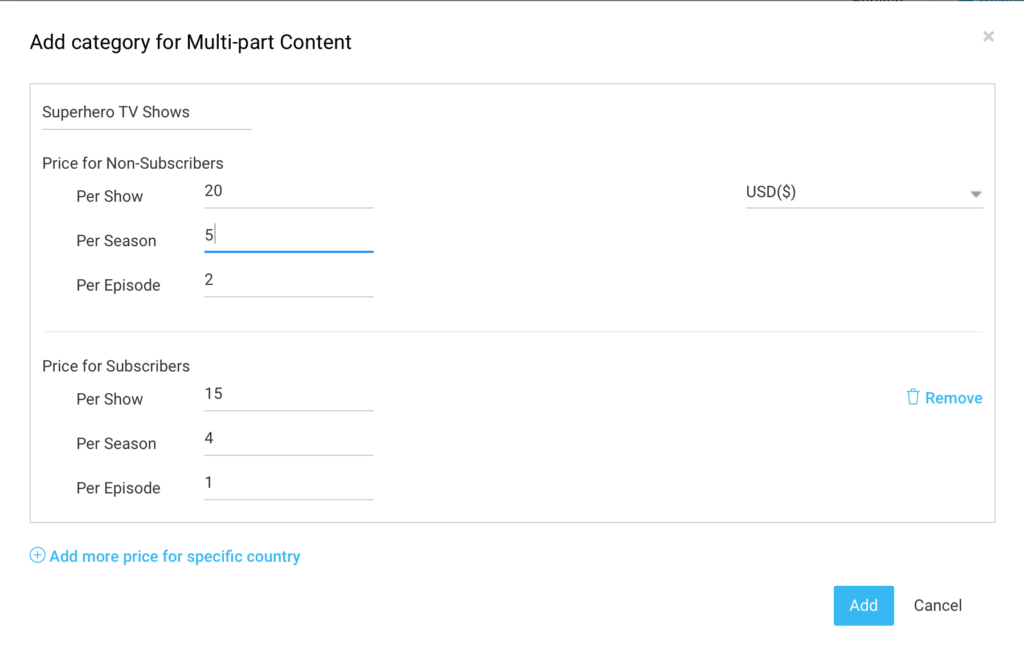
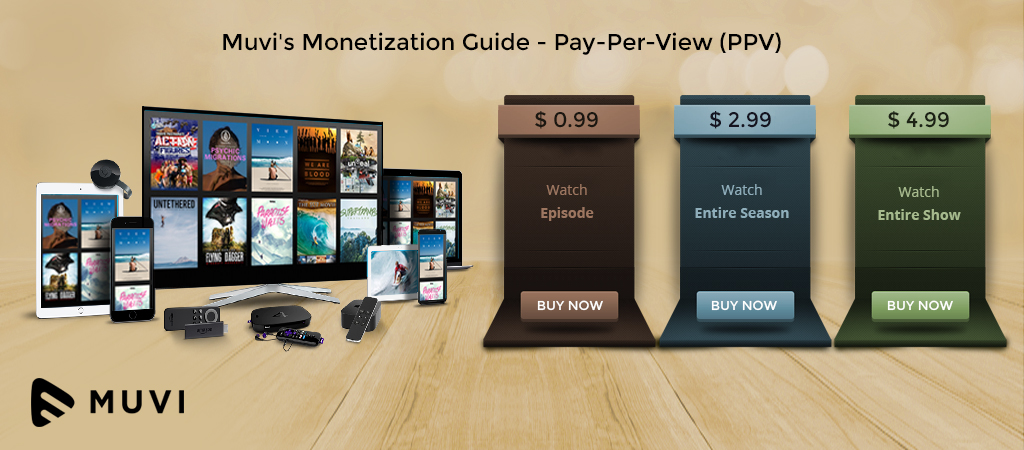
Over here you will have to setup pricing for your default currency first, and you can setup Non-Subscriber pricing and Subscriber Pricing, similar to Single Part content. The major difference in Multi-Part content now comes from the fact that you can setup PPV pricing for Entire Show, a single season or a single episode.
So for e.g. if you have Iron Fist as the TV Show you want to sell on PPV, you can setup pricing for Non Subscriber for the Entire TV Show including any new seasons and episodes you add in future for $20, you can sell a single season including any new seasons you add in future for $5 and you can setup per episode pricing for $2
You can similarly setup a differential pricing for Subscribers, offering them a discounted offer, you can setup Multiple Currencies and also later add a differential pricing for different countries using the options in this dialog box!
This flexibility allows you to sell your multi-part content the way you wish to, if you are selling traditional TV Shows, or a series of Cooking Videos or else Yoga or Fitness sessions, you can setup a single season with multiple episodes or multiple seasons and multiple episodes allowing you to monetize the entire Class or Show, it’s Seasons or it’s individual episodes broken brown into Multi-Currency and Multi-Countries and regions as per your requirement!
Next – Adding Content to this Multi-Category PPV
So now that we have created “Superheroes TV Shows” as the Pay Per view category for Multi Part Content format, we need to add “Contents” or TV Shows manually to this category. Please note that you can only add pre-existing content to this category, so before proceeding further please ensure you have uploaded your content and is already present in your content library.
Let’s head over to Manage Content -> Content Library
This opens up all your content currently present on the platform, from here you can either use the filters or search to narrow down and display the content you want to set PPV for.
Once you see the content you want to set as PPV, click on “Set PPV” link on the action menu of the content

This will open up the “Category” dialog box and from the drop down you can select “Superhero TV Shows” as the PPV Category for this TV Show.
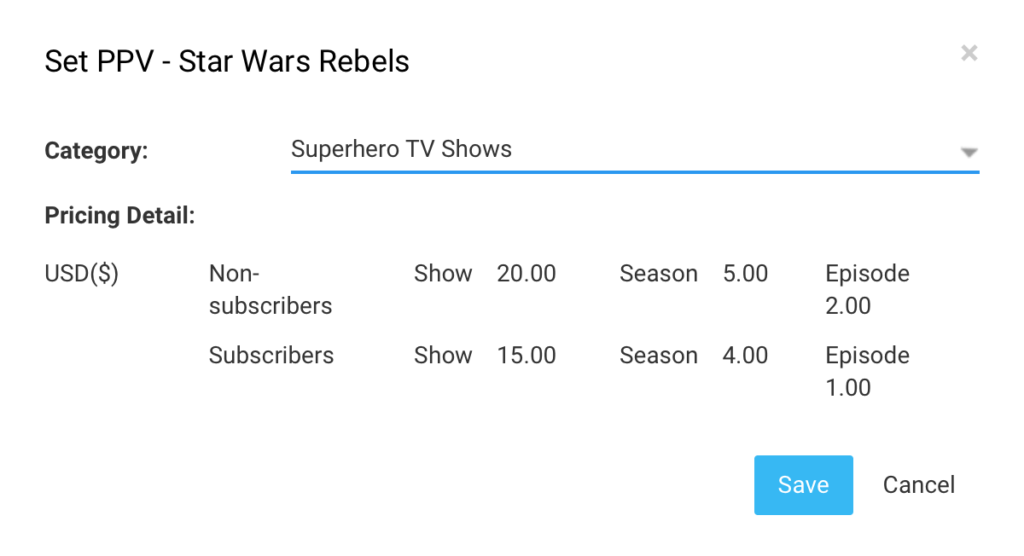
That’s it, your content is now associated with PPV Category, you can repeat the same process of adding multiple TV shows or content to this category now.
Please note – Your content category name can be anything, this is not displayed to the viewer on the frontend, so pick something you know you associate with easily and more so from the pricing perspective of how much you want to charge your viewers, also note in future if you want to change pricing, all you need to do is change the pricing at the category level and all the content within that category will automatically be updated to new pricing immediately. Hence it’s quite important you pick the PPV categories carefully.
Learn more about setting up monetization of your content with Pay-Per-View with Muvi!




Add your comment