Don’t Have a FAST Channel? Launch Your Own FAST Channel With Muvi Playout!
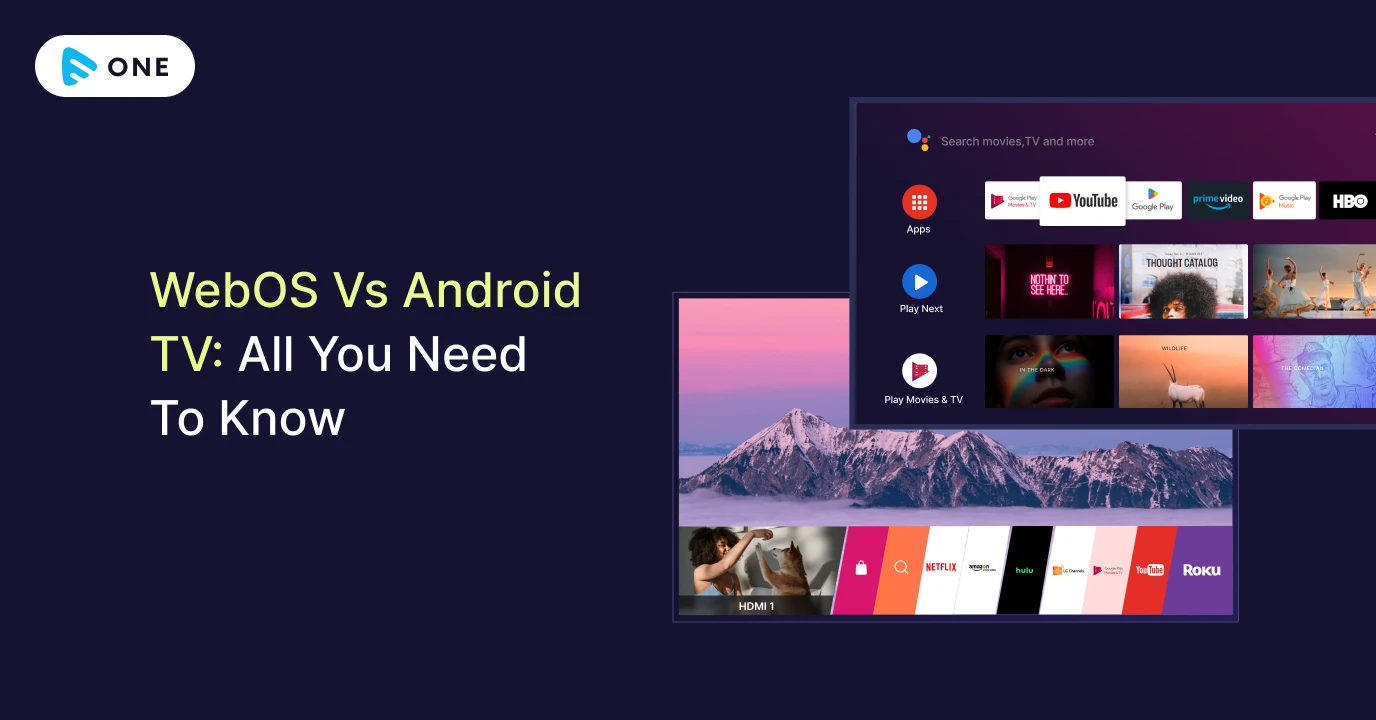
Hey! You have already created your FAST channel but don’t know how to add FAST channel in Fire TV! In this blog, we will help you with the steps to add your FAST channels to Fire TV!
FAST channels represent the future of television. However, to thrive in this expanding FAST ecosystem, merely creating your own FAST channel isn’t sufficient. Ensuring that your channel is accessible on all major devices is crucial. Proper distribution and strategic placement of your channels are essential for success.
To gain maximum viewership, you must ensure your FAST channel is added to Fire TV, Android TV, Roku, Samsung Plus App, Apple TV + and all other major platforms.
How To Add FAST Channels on Fire TV?
Step 1: Create Your Catalog File
Begin by creating an XML file containing your media metadata. This file should adhere to our Catalog Data Format (CDF) specifications, ensuring that all necessary information about your media is accurately captured.
Step 2: Validate Your Catalog File
Once your catalog file is created, the next step is to validate it against the CDF schema (XSD) file. This validation process checks for any errors or inconsistencies in your XML file, ensuring it meets the required standards and format.
Step 3: Set Up Your AWS Account
To upload your catalog file, you need an AWS account. Set up your AWS account with the appropriate permissions, enabling you to access and upload files to a specific S3 bucket. This setup will involve configuring your IAM roles and policies to ensure you have the necessary access rights.
Step 4: Upload Your Catalog File
With your AWS account configured, proceed to upload your validated catalog file to the designated S3 catalog bucket that Amazon has created for you. This can be done using the AWS Command Line Interface (CLI) for efficient and secure file transfer.
Step 5: Verify Your Uploaded Catalog File
After uploading, Amazon generates an ingestion report. Review this report carefully to confirm that your catalog file was successfully ingested without any issues. The report will provide details on the status of your file and highlight any potential errors that need to be addressed.
Step 6: Update Your Catalog at Regular Intervals
It’s important to keep your catalog file up to date. Regularly review and update your catalog to reflect any new media metadata or changes. Each time you update your catalog, validate the new file against the CDF schema and upload it to the S3 bucket, following the same steps outlined above. Always verify the ingestion report after each update to ensure successful processing.
Optional: Use Page Collation
For larger catalogs, consider submitting your data in smaller, more manageable parts instead of one large file. This approach, known as page collation, can help streamline the upload process and reduce the risk of errors during ingestion. By breaking your catalog into smaller segments, you can more easily manage and update your data as needed.

Requirements for Catalog Ingestion/Channel Addition
To add FAST Channel in Fire TV following are requirements:
Video-on-Demand Content: Catalog ingestion is only for apps with on-demand movies, TV shows, and similar media, like IMDb.
Media Metadata Access: You need to export your media’s metadata from a database. If that’s not possible, you’ll have to create your catalog file manually. Once exported, structure the metadata according to the Catalog Data Format schema.
AWS Account: You or someone in your organization needs an AWS account and should be familiar with AWS S3 tools, or be willing to learn them. You’ll need to use AWS Command Line Interface (CLI) commands to upload your catalog file to AWS for Fire TV integration. Amazon recommends using the AWS SDK for automation.
Onboarding and Setup: Setting up your system takes about two weeks, during which Amazon will provide an S3 bucket for testing catalog integration. You’ll need to be onboarded with the integration process by your Amazon business contact. If you don’t have one, reach out to Amazon for assistance.
Minimal Matching Fields: The Title field is required for metadata. You must also provide at least two additional fields, ideally three or more. These can include ReleaseYear, Credits (Actor and Director), RuntimeMinutes, SeasonInShow or SeasonID (which must reference a valid season), and ShowTitle or ShowID.
Automation Scripts: The process involves multiple steps that can be streamlined with automation. Consider assigning a developer to script and set up a cron job to automate this process.
Click here to know more about the process.
Latency Time Before Content is Live
Catalog ingestion isn’t instantaneous; it can take up to 24 hours for new data to appear on devices and in search results.
To ensure optimal performance, submit your catalog content 72 hours prior to the broadcast, especially for significant launches.
To prevent spoilers, utilize the MetadataAvailabilityDate tag in your catalog file. This ensures your content won’t be visible until the specified date and time.
Getting Started with Universal Search and Browse
The process for integrating with Universal Search and Browse is detailed in the following steps:
- Step 1 – Integrate Your App with Launcher
- Step 2 – Verify Deep links from Catalog
Click here to know more about the process.
Requirements for Universal Search and Browse
Catalog Ingestion:
Submit your media metadata into a catalog file for ingestion into Amazon, as detailed in the Catalog Ingestion guide. You can carry out the development work for catalog ingestion concurrently with making the necessary changes to your app for Universal Search and Browse. These processes can run in parallel.
Launcher Integration:
Configure your app to integrate with the media launcher on Fire TV’s home screen. This allows customers to launch content from your catalog directly, without needing to open your app first.
TV Input Framework Integration:
To display your linear content in Fire TV’s Channel Guide and the On Now row on the home screen, you must integrate with the TV Input Framework (TIF).
Testing the Integration:
After modifying your app for launcher integration, thoroughly test your integration before re-publishing your app.
Ending Notes
Above process can seamlessly help you add your channels to Fire TV, and then those channels can be placed over the home screen too. Capture your audience’s attention quickly and effortlessly. If you want to launch and manage your FAST channels with ease, give Muvi Playout a try! Start your 14-day FREE trial now!


Add your comment